Non-English text not displaying correctly? How can I change the display language for Windows 10? A language pack needs to be installed on your computer. In this tutorial we’ll show you 2 ways to change or add additional language in Windows 10.
Method 1: Change or Add Language from the Settings App
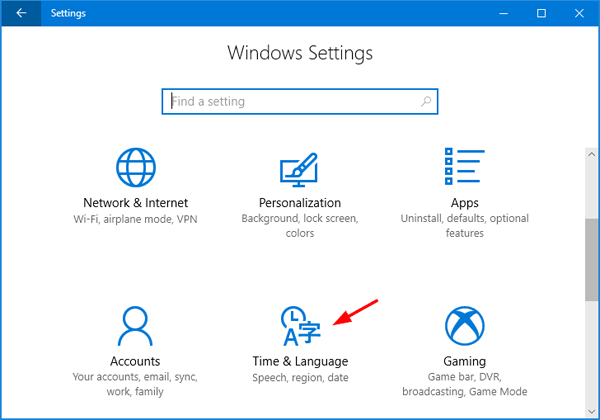
- Press Windows + I keys to open the Settings app and then click Time & Language.
![]()
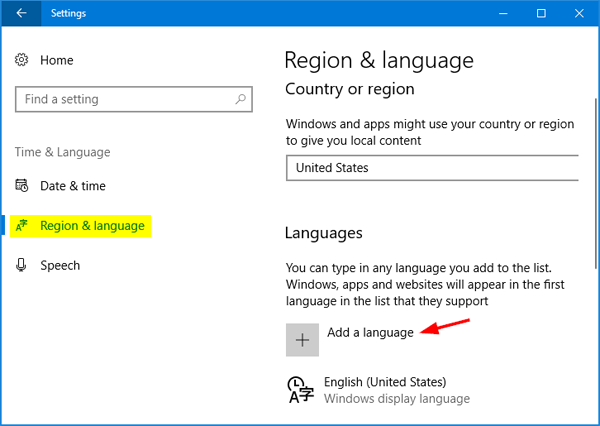
- Select the Region & language tab on the left, and then click Add a language on the right.
![]()
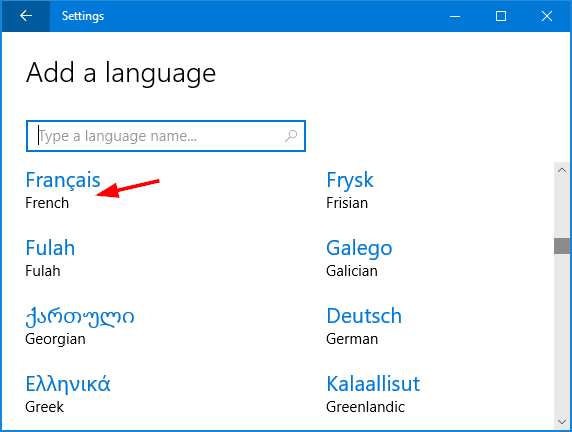
- It will show languages that are available to be installed on your PC. Choose the language you want to add.
![]()
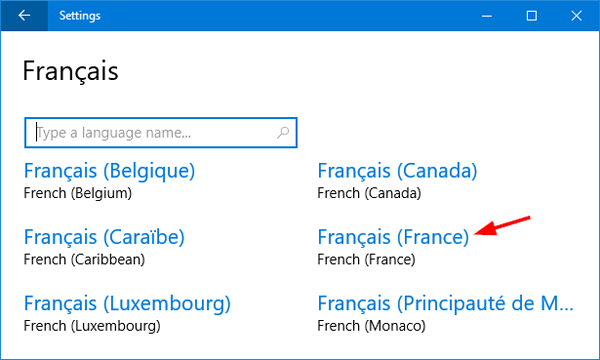
- Click on the particular language based on your region. When this is done, you can then type or read text in the new language.
![]()
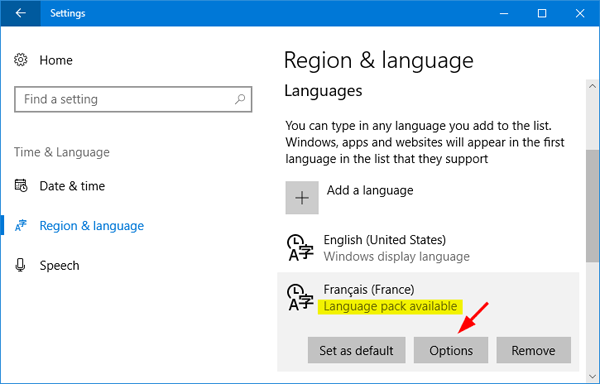
- If you want to display all system text in the new language, go back to the Region & language tab. Select the newly added language and click the Options button.
![]()
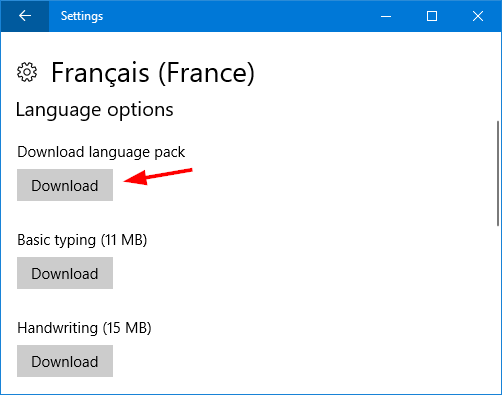
- Click the Download button beneath “Download language pack”.
![]()
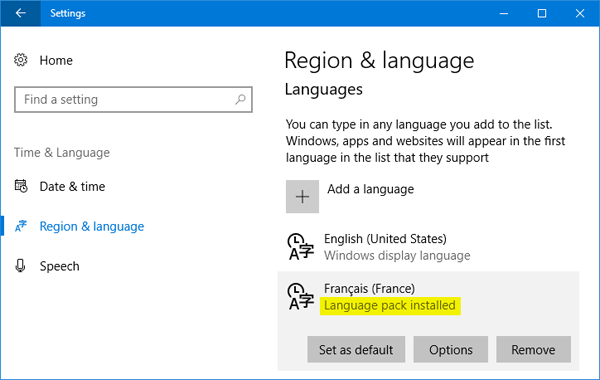
- When the language pack is installed, select the new language and click Set as default.
![]()
Reboot your computer and the new language will be used as the display language for Windows 10.
Method 2: Change or Add Language from Control Panel
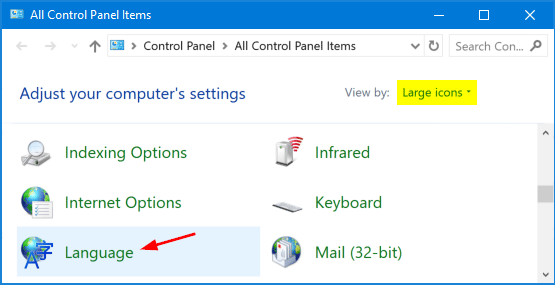
- Open the Control Panel, switch it to Large icons view. Click Language.
![]()
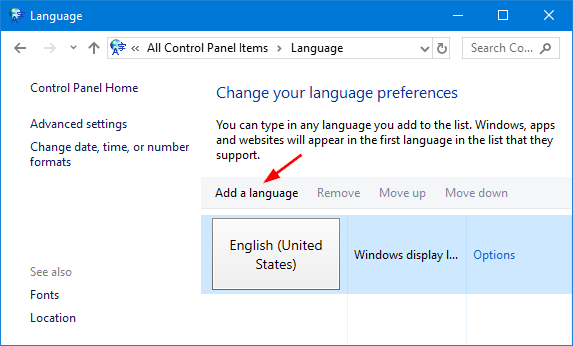
- In the Language window, click the Add a language button.
![]()
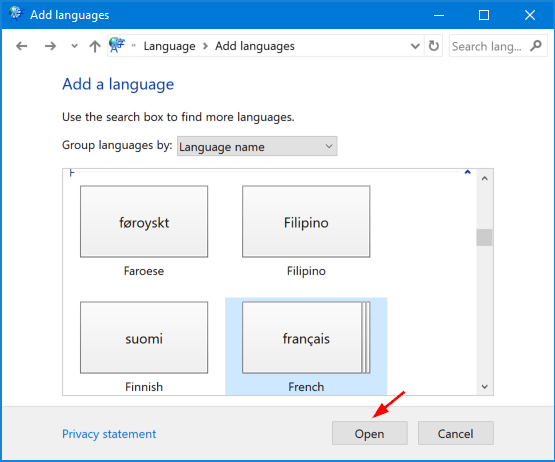
- Select a language you would like to install, and click Open.
![]()
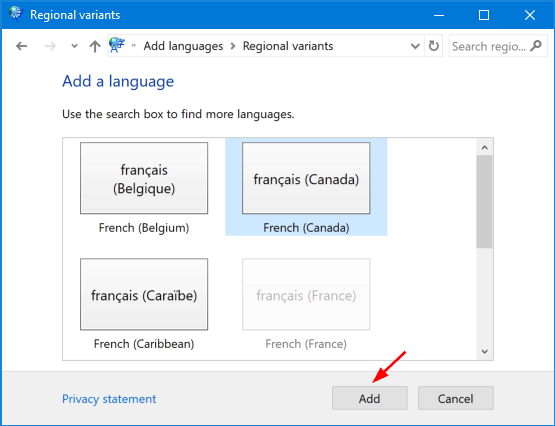
- Click the language specific to your region, and click Add.
![]()
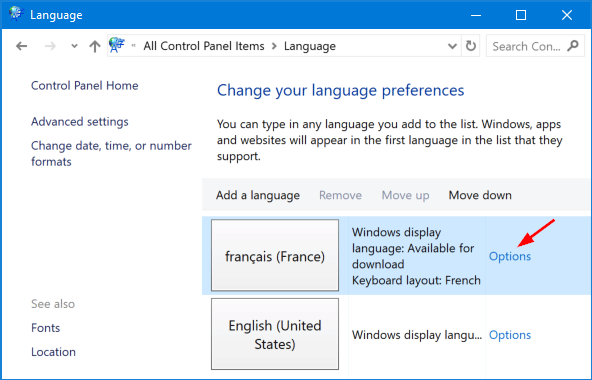
- The language that you selected is now added to the list of input languages for your keyboard. If you want to use the new language to display the user interface of Windows 10, click the Options link.
![]()
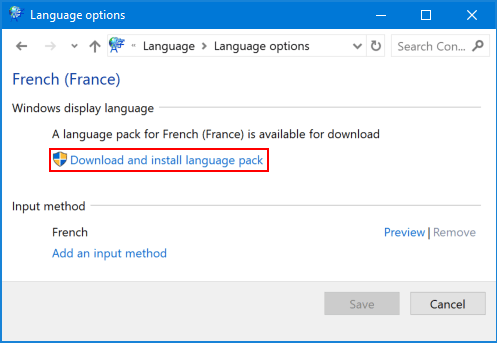
- Click Download and install language pack.
![]()
The system will display all text in the new language the next time you sign into Windows 10.
